Let me be clear from the start, the Super Antenna MP1 is a good antenna. I have one myself that I use for operating portable. The main reason I chose it was because of the extremely compact size when disassembled. You see, I tend to go out on my bicycle, and while taking a fiberglass “squid pole” is possible, it’s a bit of a pain having a chunky pole strapped to the crossbar. With a few cheap mods, we can improve it from being a good antenna into a great antenna!
The Whip
The Super Antenna packs down to a maximum length of around 12 inches, so it’s ideal for stuffing into a backpack. However, this short length comes at the cost of antenna efficiency. The original whip is only 44 inches long when fully extended, so even on the higher bands, you’re relying on the loading coil to make up the difference, and when you’re operating QRP, that drop in efficiency is eating an awful lot of your already limited power.
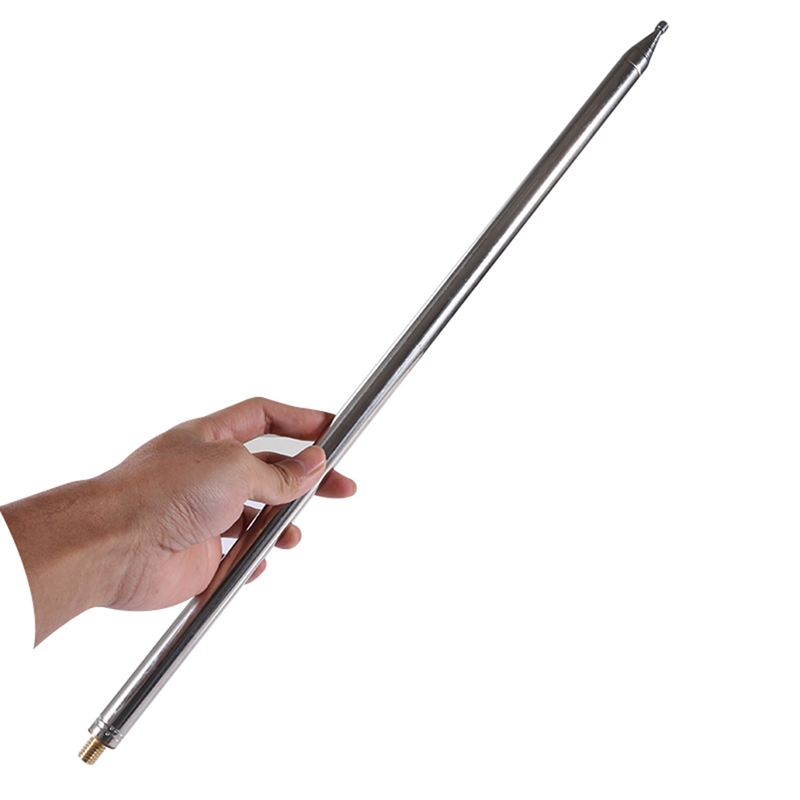
MFJ make a product they call the MFJ-1979, which is a 16.9ft (5.2m) stainless steel telescopic whip. This is a drop-in replacement for the standard SA whip, however, this thing costs around £100 in the UK (around $80 in the US) and that is just way too expensive for what it is. Fear not, there is a Chinese equivalent for only a quarter of the price! The BD7IBI stainless steel whip can be found for around £20 ($25).
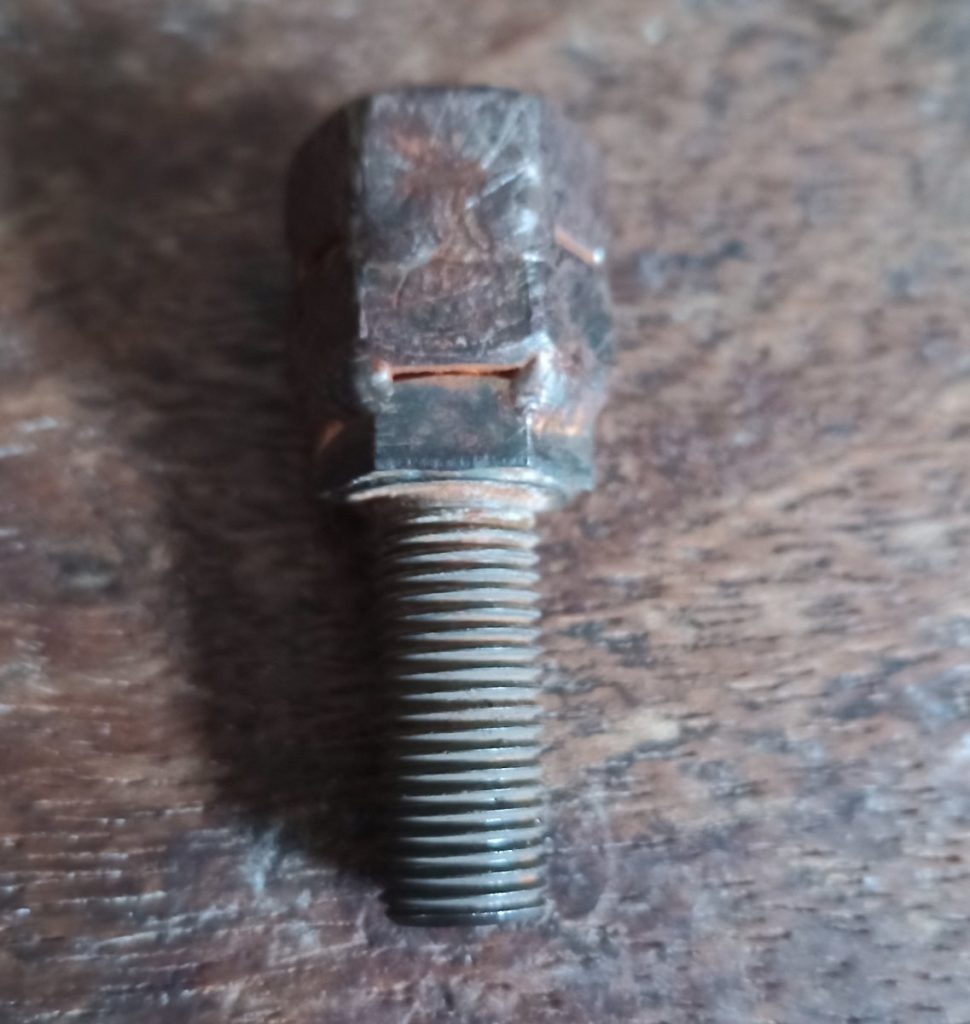
But… there is a small caveat. This version has a 10mm thread instead of the standard 3/8-24 thread we’re used to seeing on mobile whips. I had trouble trying to find adaptors for a reasonable price, so I had a friend make me one by welding 2 x M10 nuts onto the head of a 3/8-24 bolt. This certainly isn’t pretty, but gets the job done.
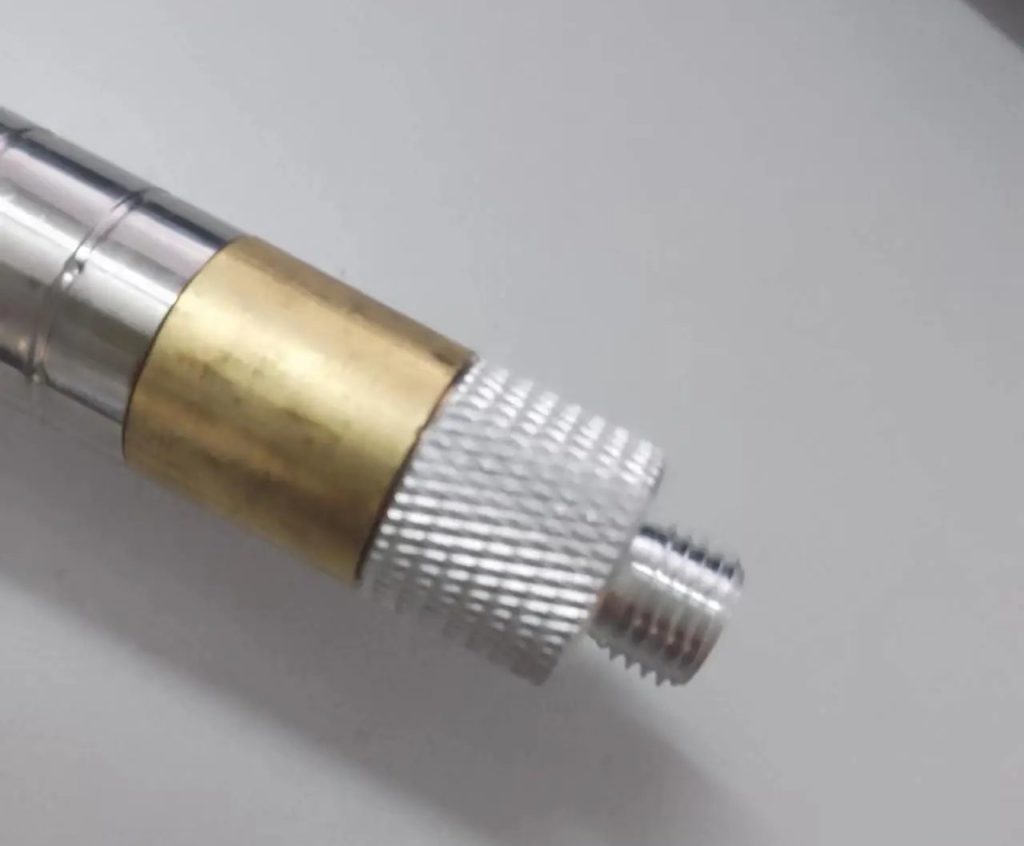
More recently, nicely machined aluminium adaptors have become available. They’re sold in packs of 2, which is a good idea as you’re bound to lose one at some point (or perhaps you might want to create a dipole or delta loop out of 2 of these whips).
By increasing the size of the whip, not only do you dramatically increase efficiency, you also get an added bonus – 80m band coverage without the addon 80m coil, and 160m band coverage with the 80m coil. As you might expect, changing the length of the whip will throw out the tuning measurements from the FG1 frequency guide, so you will need to do a little trial and error, or use an antenna analyser to set the correct length of the whip and/or position of the loading coil.
The Radials
Thanks to the great work of Rudy N6LF, we know that radials play a huge part in the efficiency of a quarter wave vertical. Through extensive testing, he discovered that when you only have limited space or wire to play with, running 8 x smaller radials will give you better results than 4 x long radials. This is due to most of the current being close to the antenna, and when the radials are directly on the ground, they get wildly detuned, so length isn’t critical either.
I have previously made up a series of splitters out of spade connectors and speaker wire to create “quick connectors” for attaching radials. I made a network of radials out of 20AWG silicone wire, primarily because the silicone wire doesn’t tend to tangle itself into a birds nest quite so easily, especially if you properly “hank” the radials up after use.
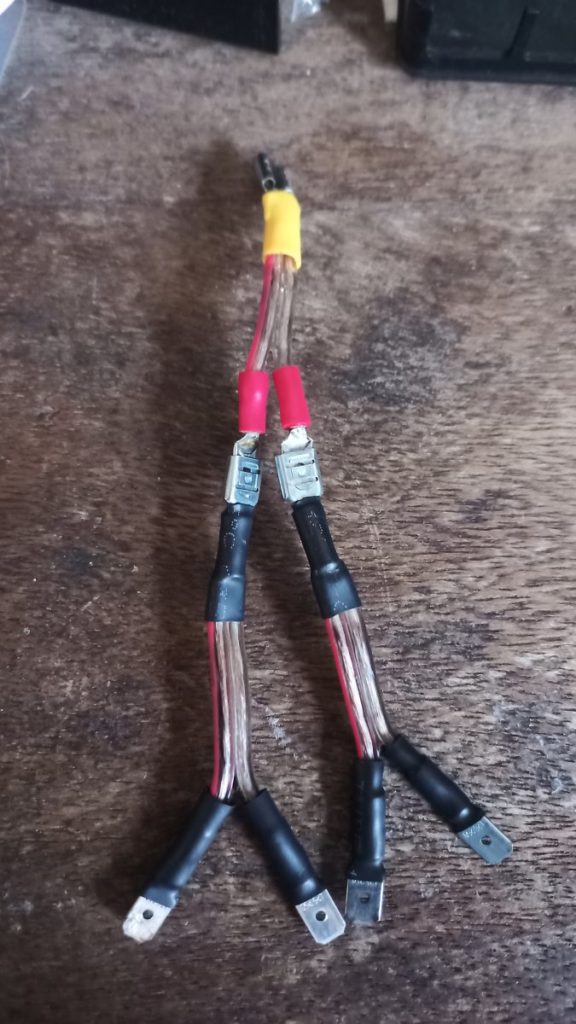
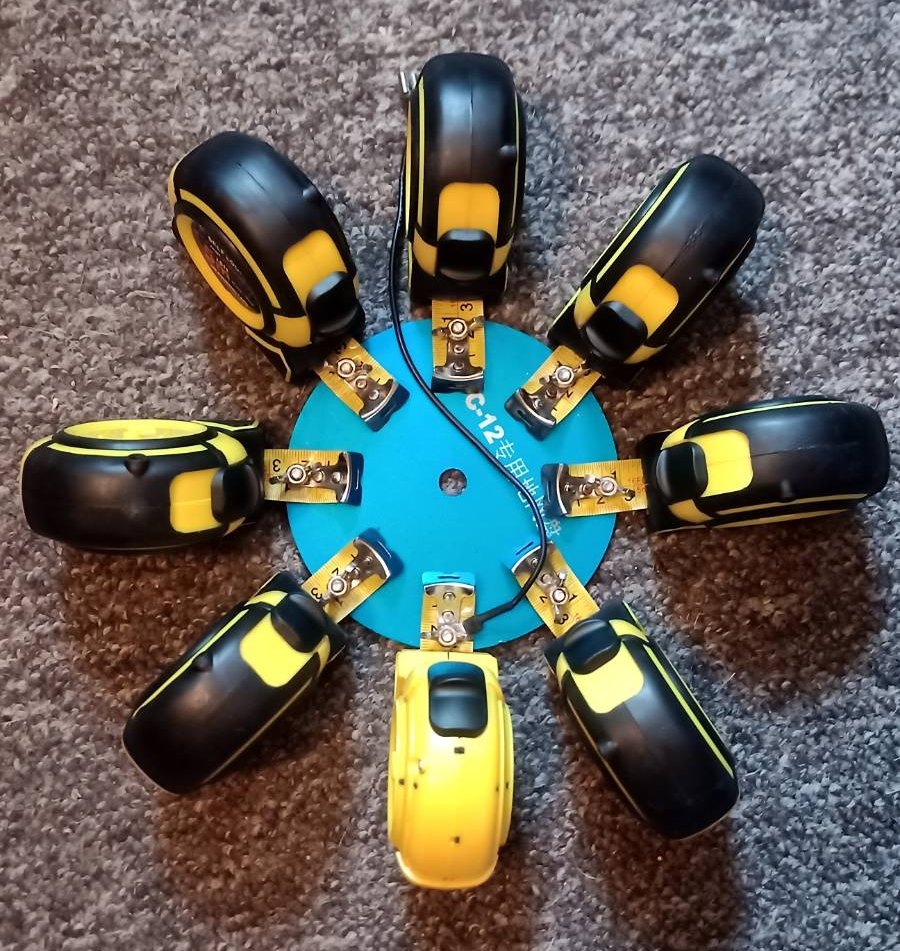
This was before I discovered the network disk intended for the JPC-12 antenna. Using one of these means you can keep all the radials attached to the disk, and only have one short lead to connect to the Super Antenna tripod. It comes with all the bolts, washers, and wingnuts you need to attach your wire.
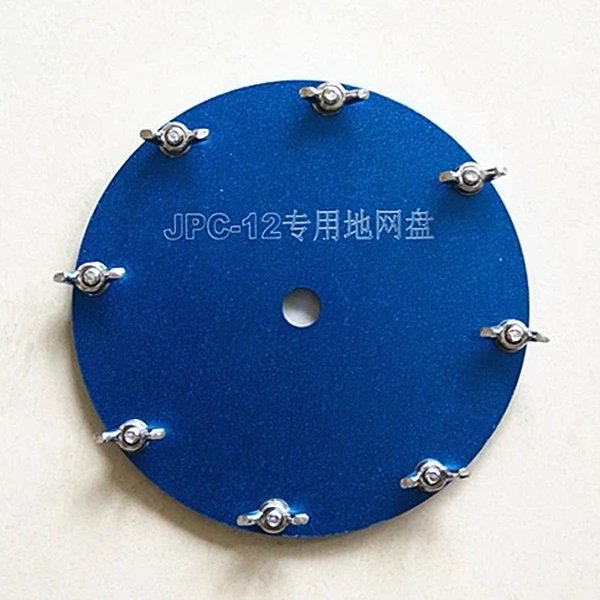
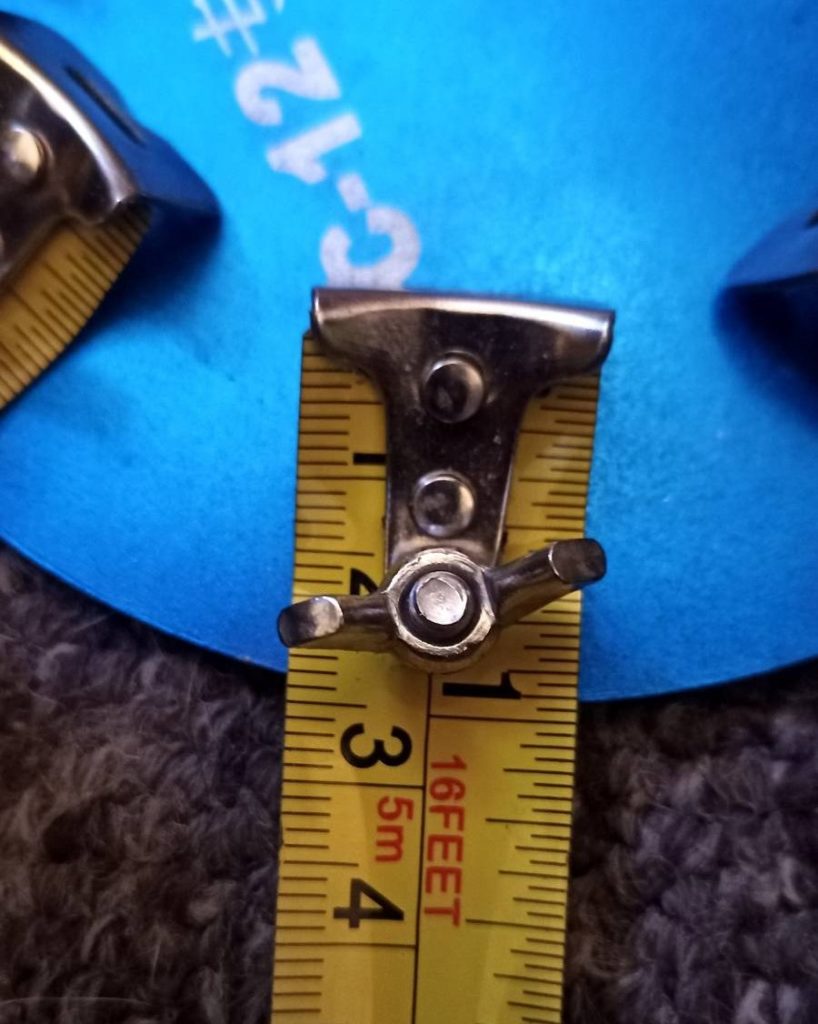
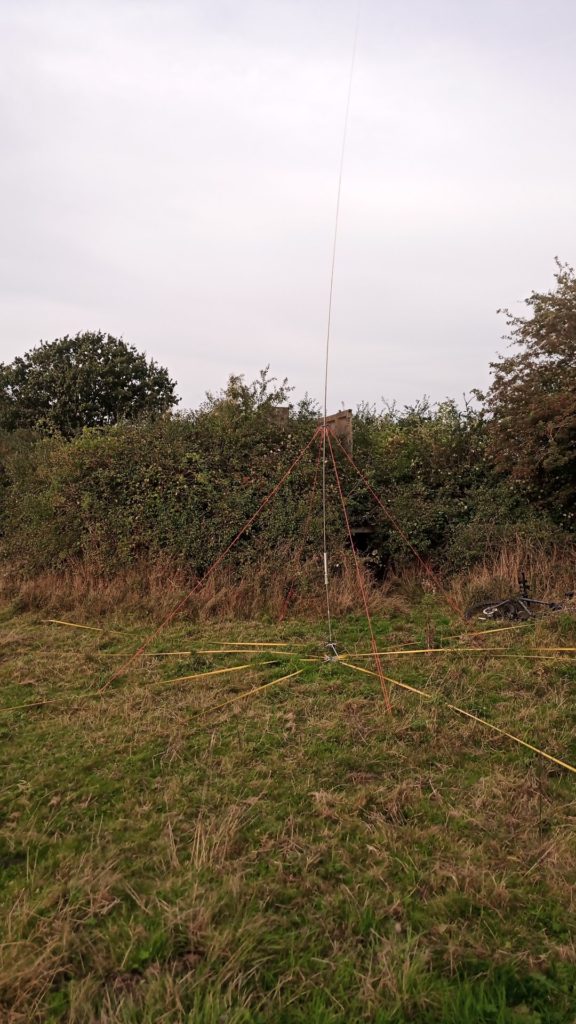
This considerably speeds up setup/teardown, but I was still getting fed up with how long it took to wind up the radials after a session, so I wanted to take this idea further. Enter the tool every ham repurposes into an antenna at some point – the humble retractable tape measure! You can usually pick these up cheaply at your local pound shop (dollar store for our US friends) as the quality isn’t really important. 8 of these attached to the network disk mean you can deploy an excellent ground plane in a matter of seconds, and packing them away becomes equally fast.
I drilled through one of the rivets for extra strength. Take your time, securely clamp/grip the tape and gradually go up in drill bit size as the bit has a tendency to bite and twist the end of the tape.
Conclusion
With a few simple parts we’ve increased efficiency, gained 1 or 2 extra bands, and made setup and teardown much quicker and easier. Do be aware that all of these mods will increase the overall weight of the antenna, something to bear in mind if you’re hiking or biking like me.
Notes
Radiation and ground loss resistance in verticals by Rudy N6LF
How to neatly “hank” your radials